Connect Google Calendar
Bookings appear in your Google Calendar, and (with two-way sync, Pro and Business) busy times in Google block your booking page. Takes about three minutes.
Open Settings → Integrations.
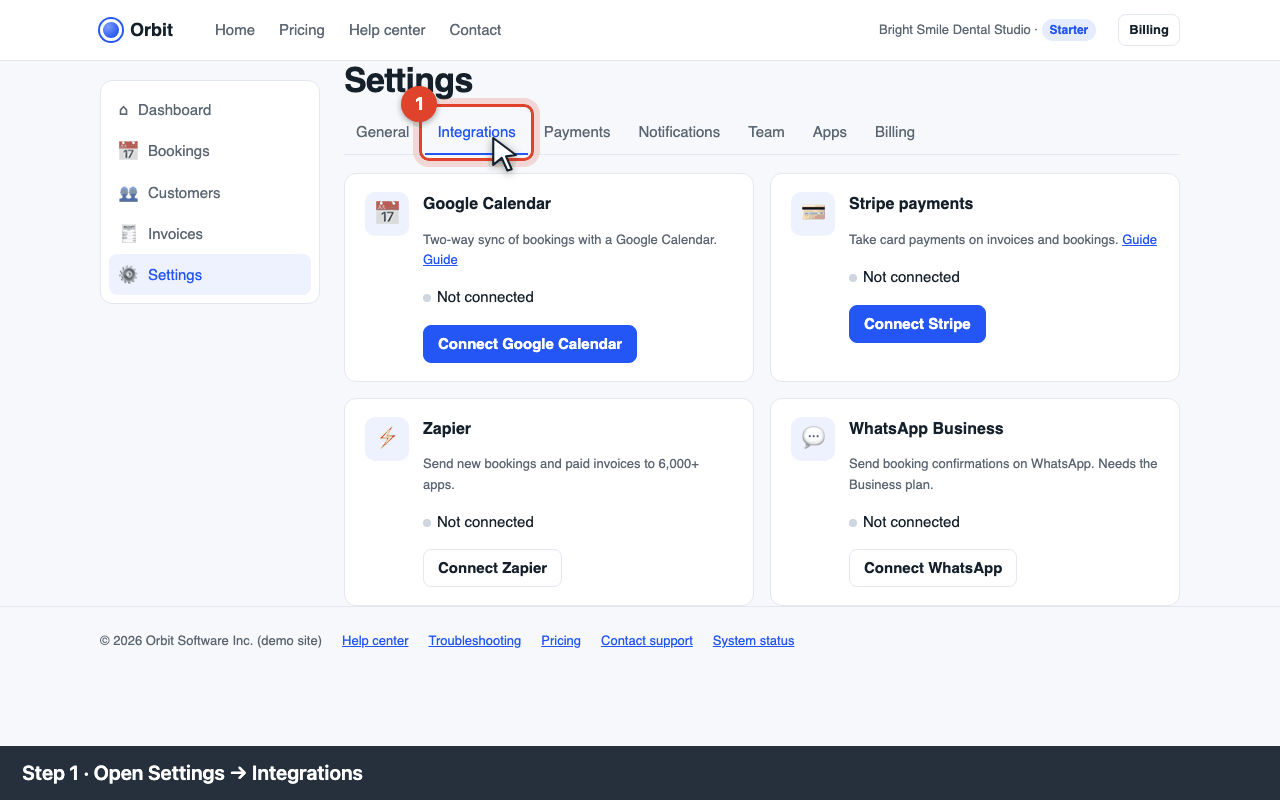
Settings → Integrations tab On the Google Calendar card, click Connect Google Calendar. A three-step setup opens under the card.
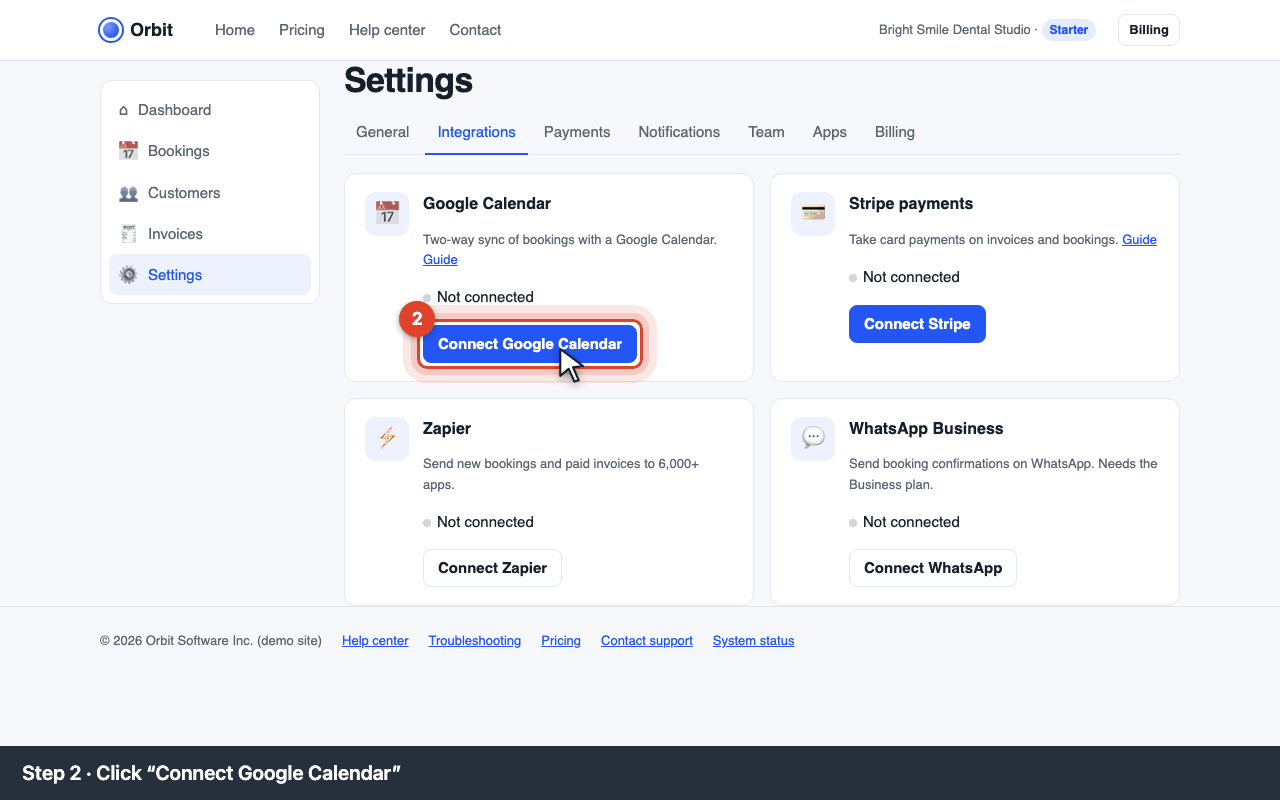
The Google Calendar card with the Connect button Step 1 of 3 · Choose a Google account. Pick the account that owns the calendar and click Continue. If Google refuses access you'll see E-CAL-403 permission denied; pick another account or ask your Workspace admin (see below).
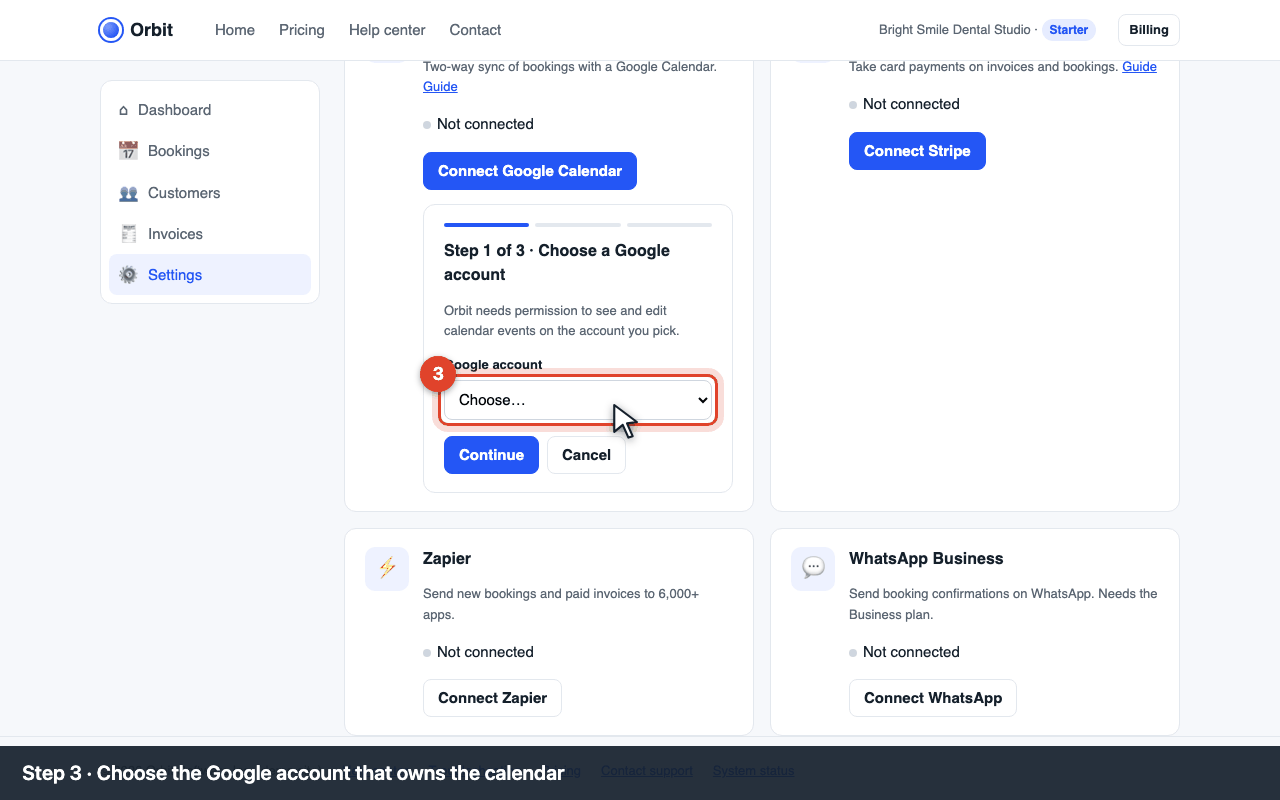
Step 1: choose the Google account Step 2 of 3 · Pick the calendar. Orbit writes bookings to this calendar. Most businesses create a dedicated calendar such as “Appointments”. Click Continue.
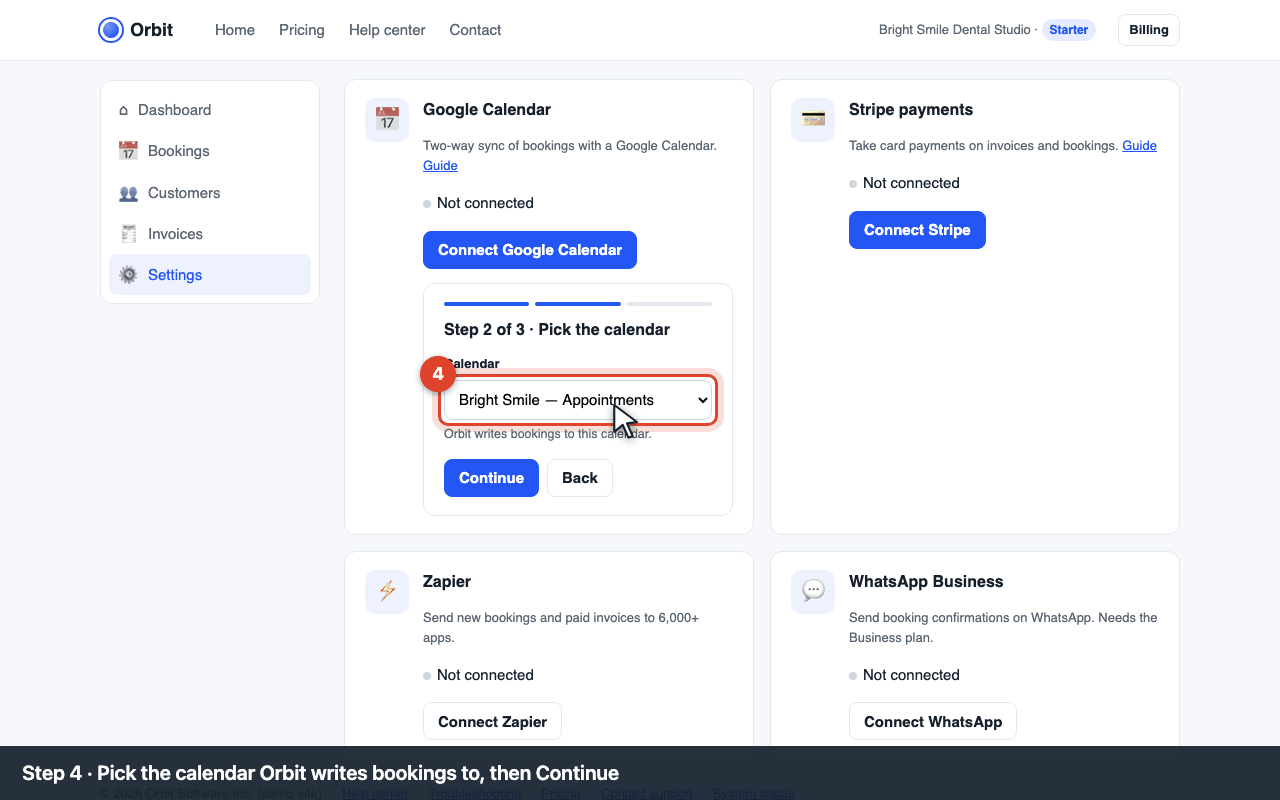
Step 2: pick the calendar Step 3 of 3 · Sync direction. Choose Two-way (recommended, Pro and Business) so busy times in Google block Orbit too, or One-way (all plans) to only send bookings to Google. On the Starter plan, choosing Two-way shows E-PLAN-004. Click Finish setup. The card now shows Connected to “…”.
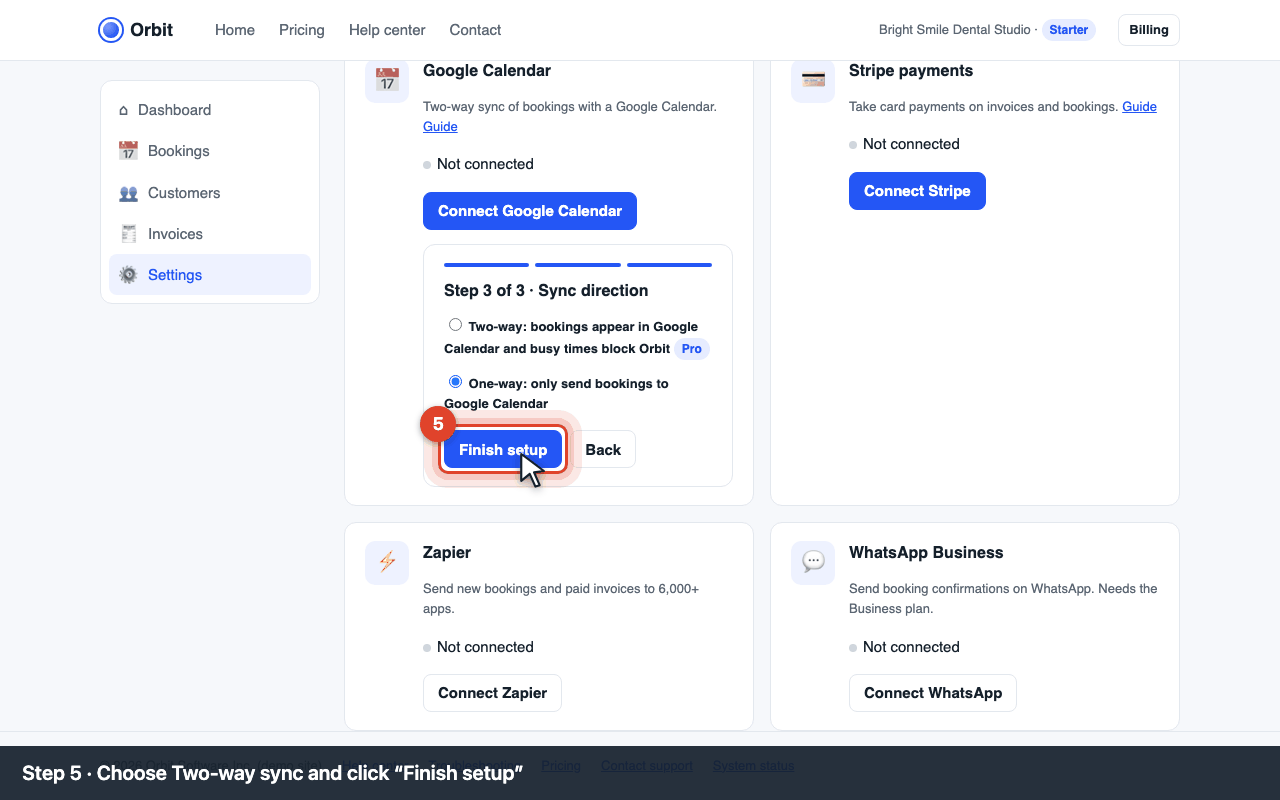
Step 3: sync direction and Finish setup
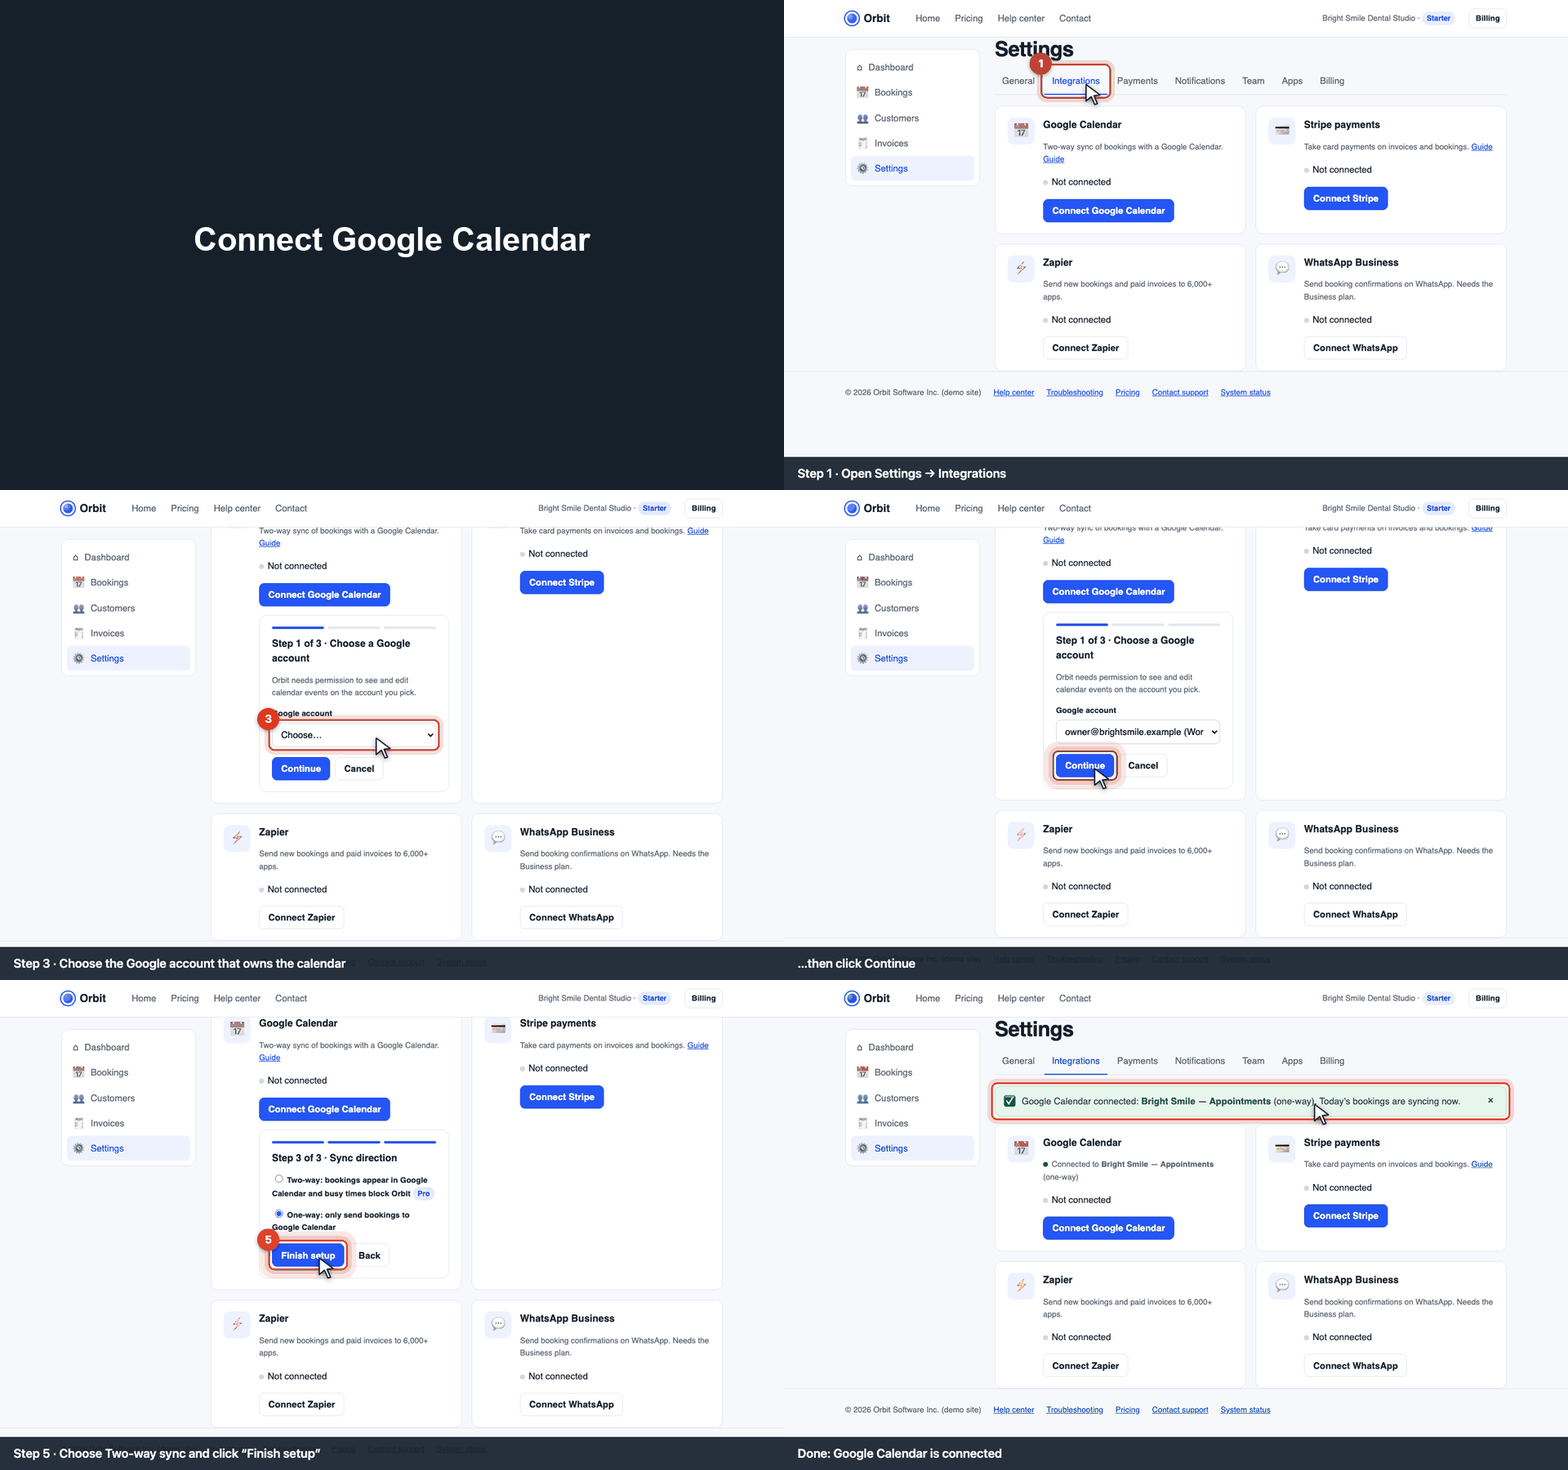
After connecting
- Existing bookings sync within a minute; new ones instantly.
- Bookings page shows “Synced with Google Calendar”.
- To change the calendar, click Disconnect and connect again.
Troubleshooting
E-CAL-403 · permission denied
Google refused calendar access for the account you chose. Causes: a Google Workspace admin blocked third-party calendar access, or you didn't tick the calendar permission in the Google consent screen. Fix: choose an account that can share its calendar (for example the owner account), or ask your Workspace admin to allow “Orbit Front Desk” under Admin console → Security → API controls → App access. Then click Connect Google Calendar again.
E-CAL-409 · calendar already connected to another Orbit account
A Google calendar can sync with one Orbit account. Disconnect it in the other account first.
Bookings don't show up in Google
Check you picked the right calendar in step 2 and that the calendar is visible in Google Calendar's left list. Then Disconnect and connect again.
E-PLAN-004 · two-way sync needs Pro
Starter includes one-way sync (Orbit → Google). Pick One-way in step 3 to finish on Starter, or upgrade to Pro in Billing and connect again for two-way.